An interesting aspect of my job is that I am sometimes asked to do weird stuff. I like weird stuff, so this is a good.
Recently, I was asked to build “turkey detector.” You see, my boss wanted a demo that we shows that we can help scientists deploy sensors, and collect and process the data from them. Furthermore, we wanted a demo that would show machine learning in action.
Oh, did I mention that there are a lot of wild turkeys strutting around this campus?
So we figured, hey, let’s deploy some cameras, take pictures, send them to a turkey classifier model, and put the results on website. What could be easier?
There are some interesting constraints:
- not having a lot of spare time to do this (have other more pressing responsibilities)
- minimal resources
- no wired electrical or network access in the most turkey-friendly outdoor areas
I added a few constraints of my own, to make things more interesting:
- the cameras need to be able to withstand the weather and operate without physical interaction for a long time. Not that we need these cameras to stay up forever, but a real camera trap should be able to last.
- don’t use proprietary hardware or software — everything open source (well, almost everything, as you’ll see)
Commercial, already-built camera traps exist, but they, as far as I know, do not sync up with wifi and do not keep themselves charged. You have to go out to change batteries and collect your memory card. Bah.
Electronic Hardware
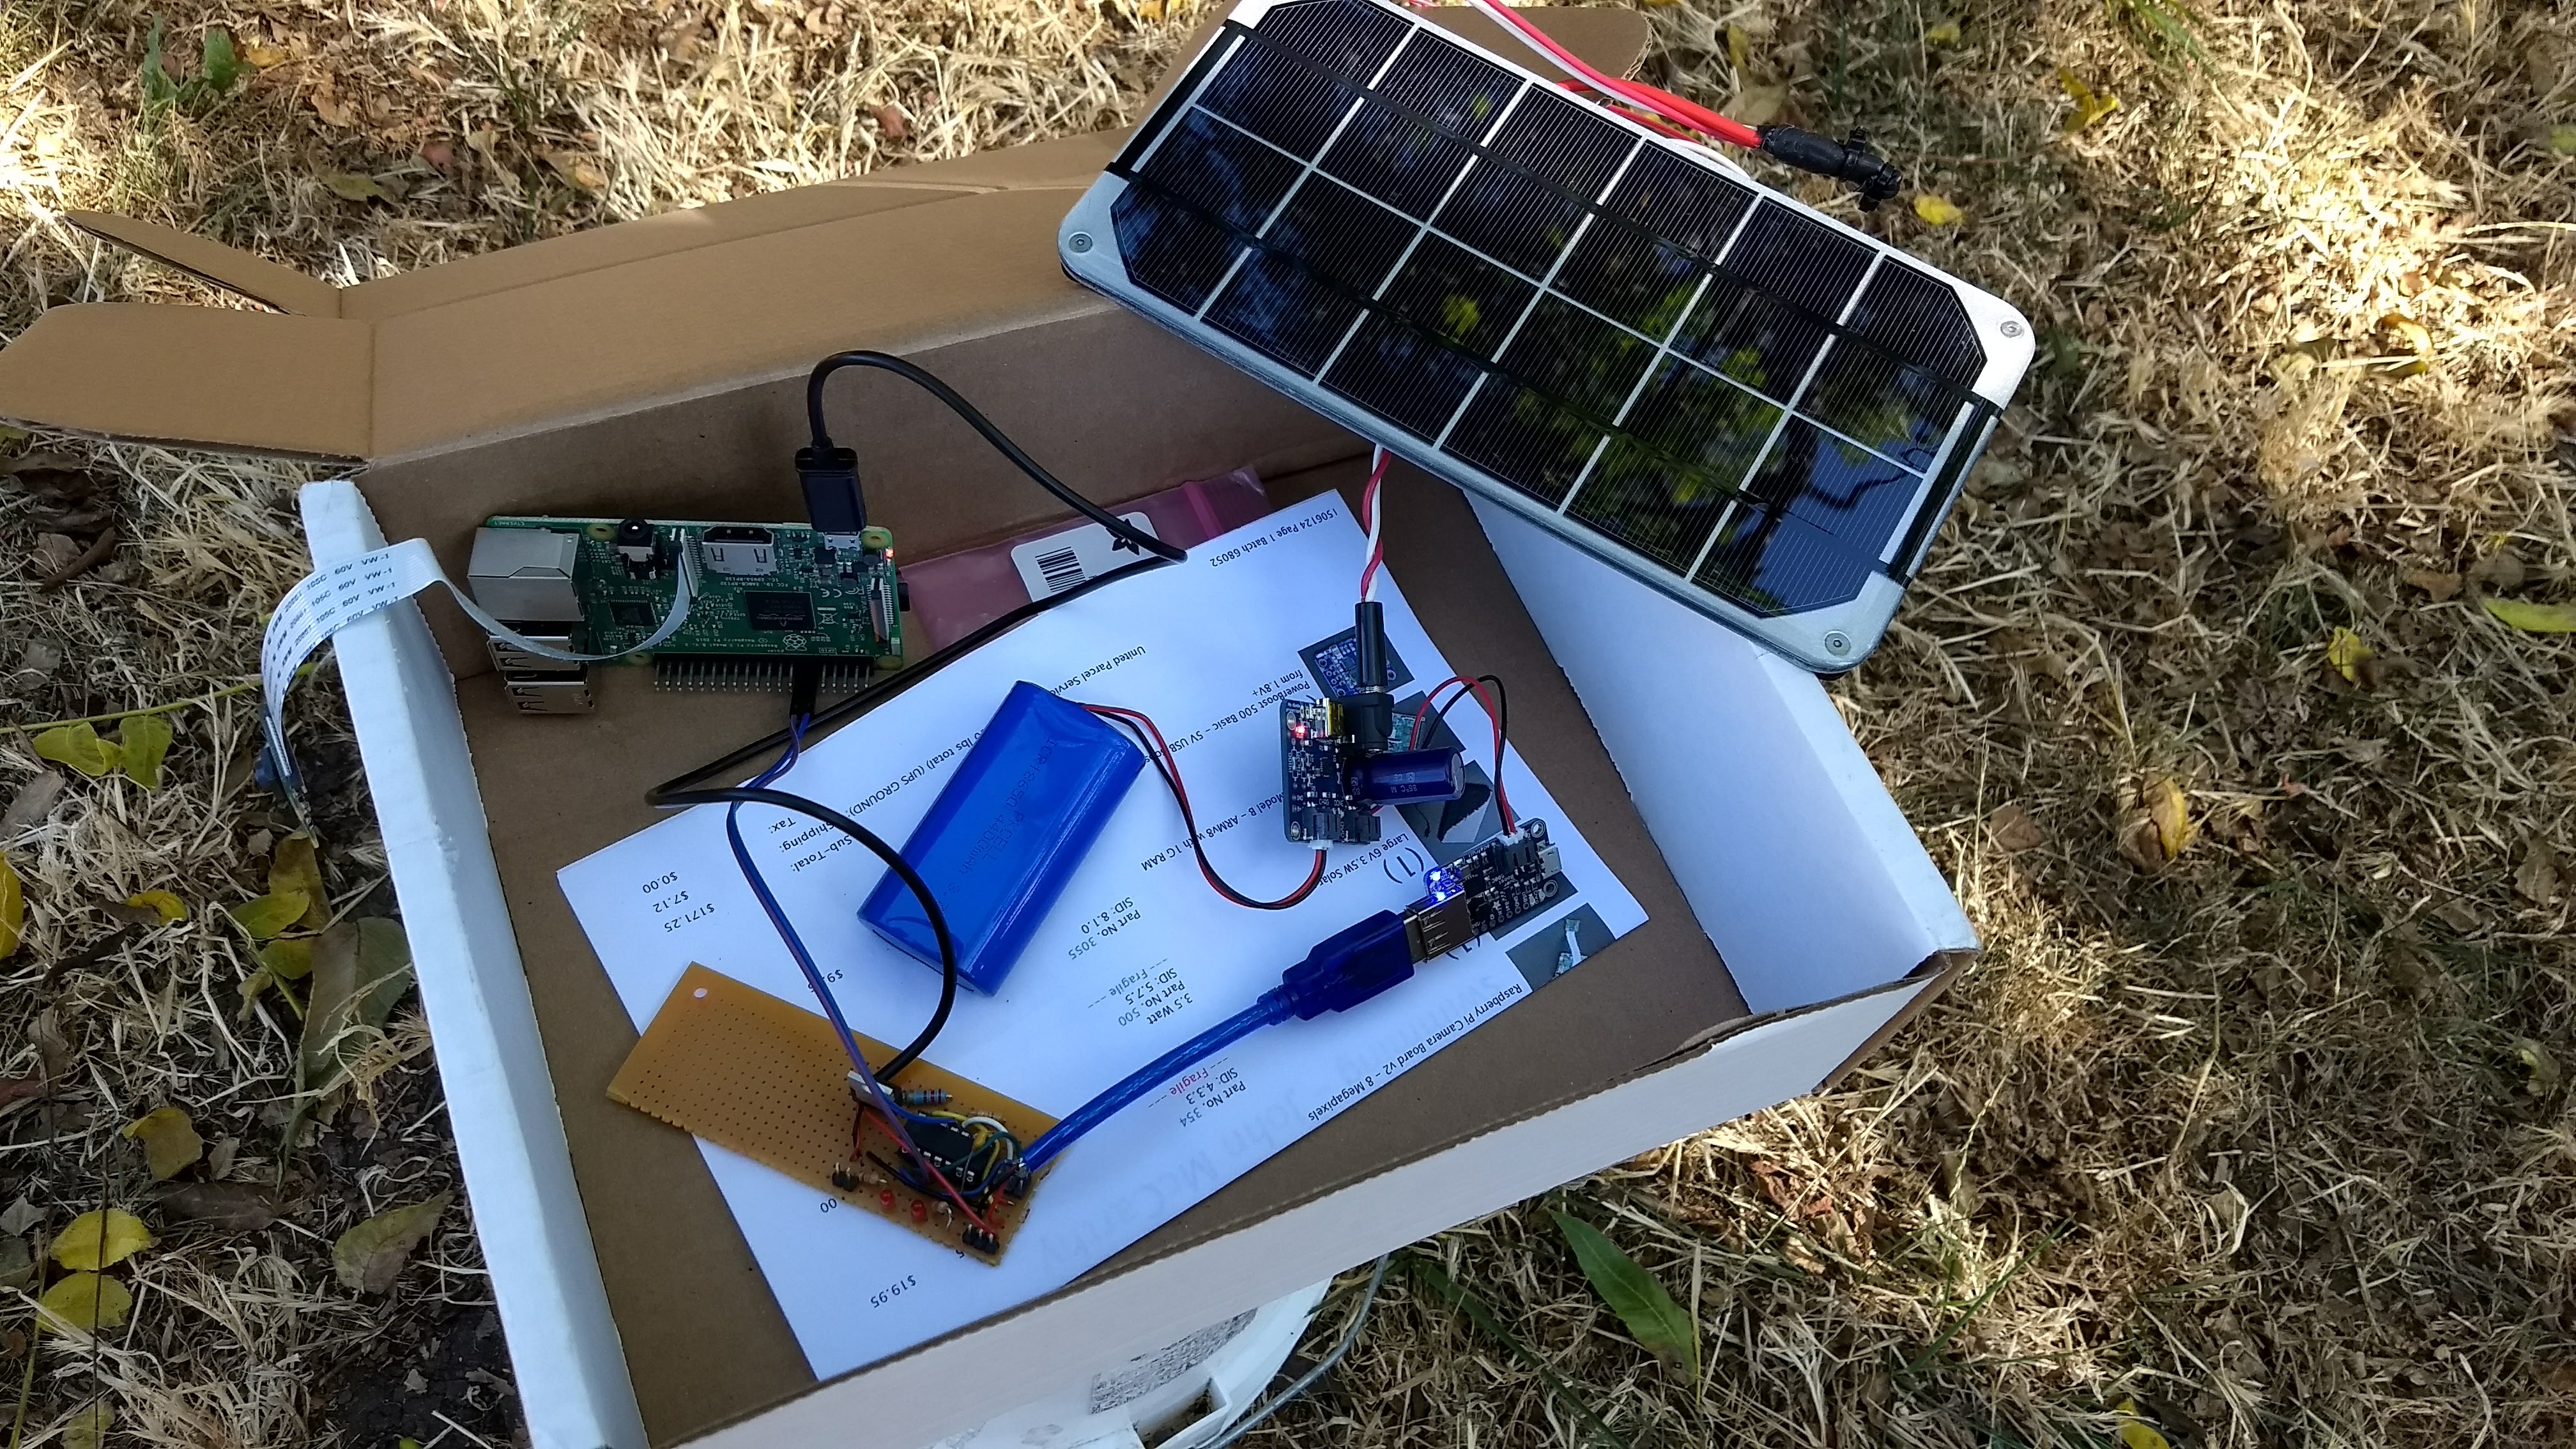
For the computer, I went with the Raspberry Pi Zero W after starting with a Raspberry Pi 3. These are ARM-based circuit board with built-in WiFi and a special port for attaching a camera. The “3” has a multi-core process and more ports. The Zero is slower but smaller and uses about 1/2 to 1/3 the power of the Pi 3.
I like the RPi platform. It’s reasonably open, simple to use (its Raspbian OS is basically like any Debian-based Linux), and crazy cheap. The Pi Zero W is $10! For the camera I used the companion “PiCamera 2” designed to go with the RPi. It’s an 8Mpixel tiny phone camera jobbie, fixed focus and fixed aperture, about $30.
Getting a hard-wired power to the unit would be out of the question, so this needs to work from battery. I ended up using a single LiPo cell, 3.7V 4.4Ah. This is enough to power the Pi for about a day without any new charge, but it’s not enough to go two days or run overnigh. To charge, two small solar 6V solar panels, 3.5W each would do that job. The panels require a charge controller to adjust the panel output to the battery. Also, the Pi requires 5V, and the battery only puts out ~3.5-4V, so a boost converter to make a stable 5V is also required. The panels were a huge ripoff, at $11/Wp and I’m not thrilled with the cost and quality of the charge controller and boost converter either, but they do work.
Here’s a picture of all the kit, in a cardboard box in my backyard. Well, almost all the kit. An RPi 3 is pictured, which I moved away from because of its power use. Also, there are two panels in the operating camera.
On a sunny, or moderately sunny day, there is enough power to operate the camera and charge the battery. On a cloudy day, the battery drains slowly, or doesn’t drain, but doesn’t charge either.
Either way, I needed a solution to deal with night. As it happens, the RPi has neither a clock to keep time while it’s off, nor a means of turning itself off or on. Because of this, I built a small companion board with an Attiny84A microcontroller connected to a FET transistor. The Attiny actually turns the RPi on in the morning and off at night, thus saving precious power. The Attiny itself does not draw all that much power, so can run continuously.
The communications protocol between the processors is primitive, but functional. The RPi has two signal wires going to the Attiny. One is pulsed periodically to tell the Attiny that the RPi is still functioning. If the pulses stop, the Attiny waits a few minutes and then turns of the power, then waits a few more minutes and turns it back on again. The other pin is used to tell the Attiny that the RPi wants to be turned off. After getting a pulse on this pin, the Attiny shuts down the RPi for an hour. The RPi also gets a low battery signal from the boost converter, which it can use to determine that it should shut itself down (cleanly) and then request to the Attiny that it be turned off. I try to avoid shutting down the Pi willy-nilly, because the filesystem might be corrupted.
I said that the RPi has no clock. When it boots it tries to connect to a network and then get the time from a time server. Once it has done this, it can proceed with normal operation and keep good time while it’s running. If it can’t get the time from the Internet, it asks to be shut down again to try again later. The RPi decides it’s time to be shut off for the night by comparing the time with sunset, as calculated from a solar ephemeris library.
All said, the power system I came up with is basically just barely adequate, and even when the battery simply cannot run the system, the unit turns off in a controlled fashion and, assuming the battery eventually charges again, the Pi will reboot eventually and get back up.
A next gen camera (already in the works) will have a much bigger battery and charging system. On e-bay, one can get 20W or 25W panels kits with charge controller for about $1/Wp for the panel, as they should be. These charge controllers are designed for 12V lead-acid batteries, though, so I’ll need to use a nice alarm system type AGM battery. A nice thing about most of these charge controllers is that they tend to have USB charger ports, so I do not need the 5V buck controller. Everything is large, though, and setting up a rack to hold the large panel is a problem I have not yet solved. But overall, the lesson I’m learning is that everything is easier when you have power to spare.
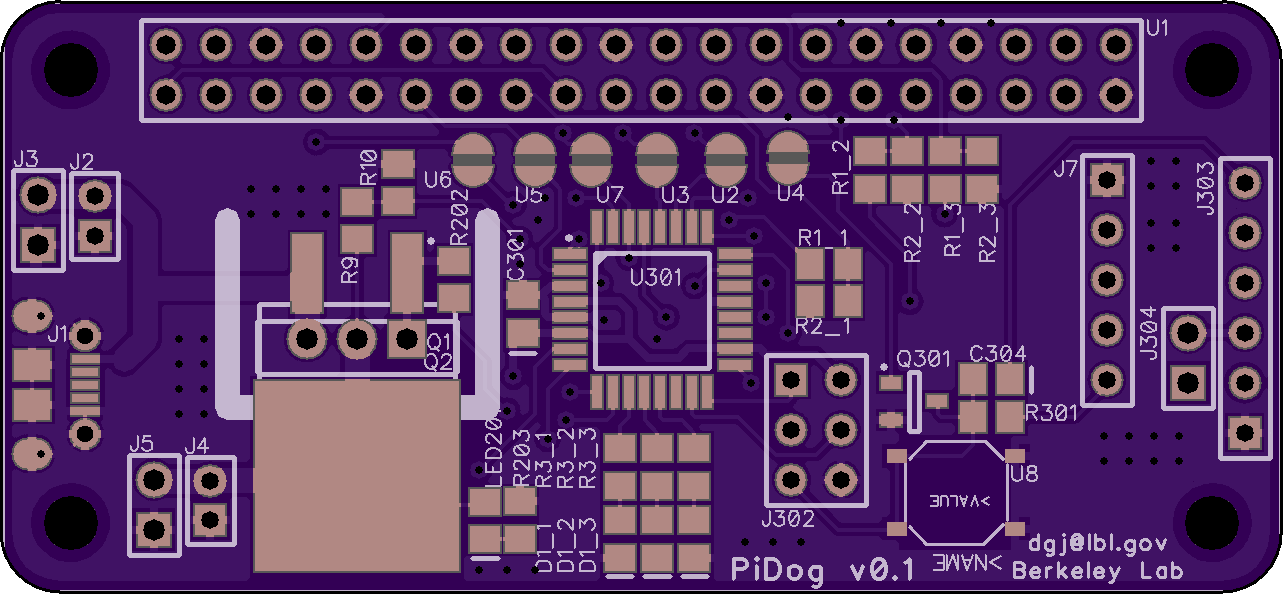
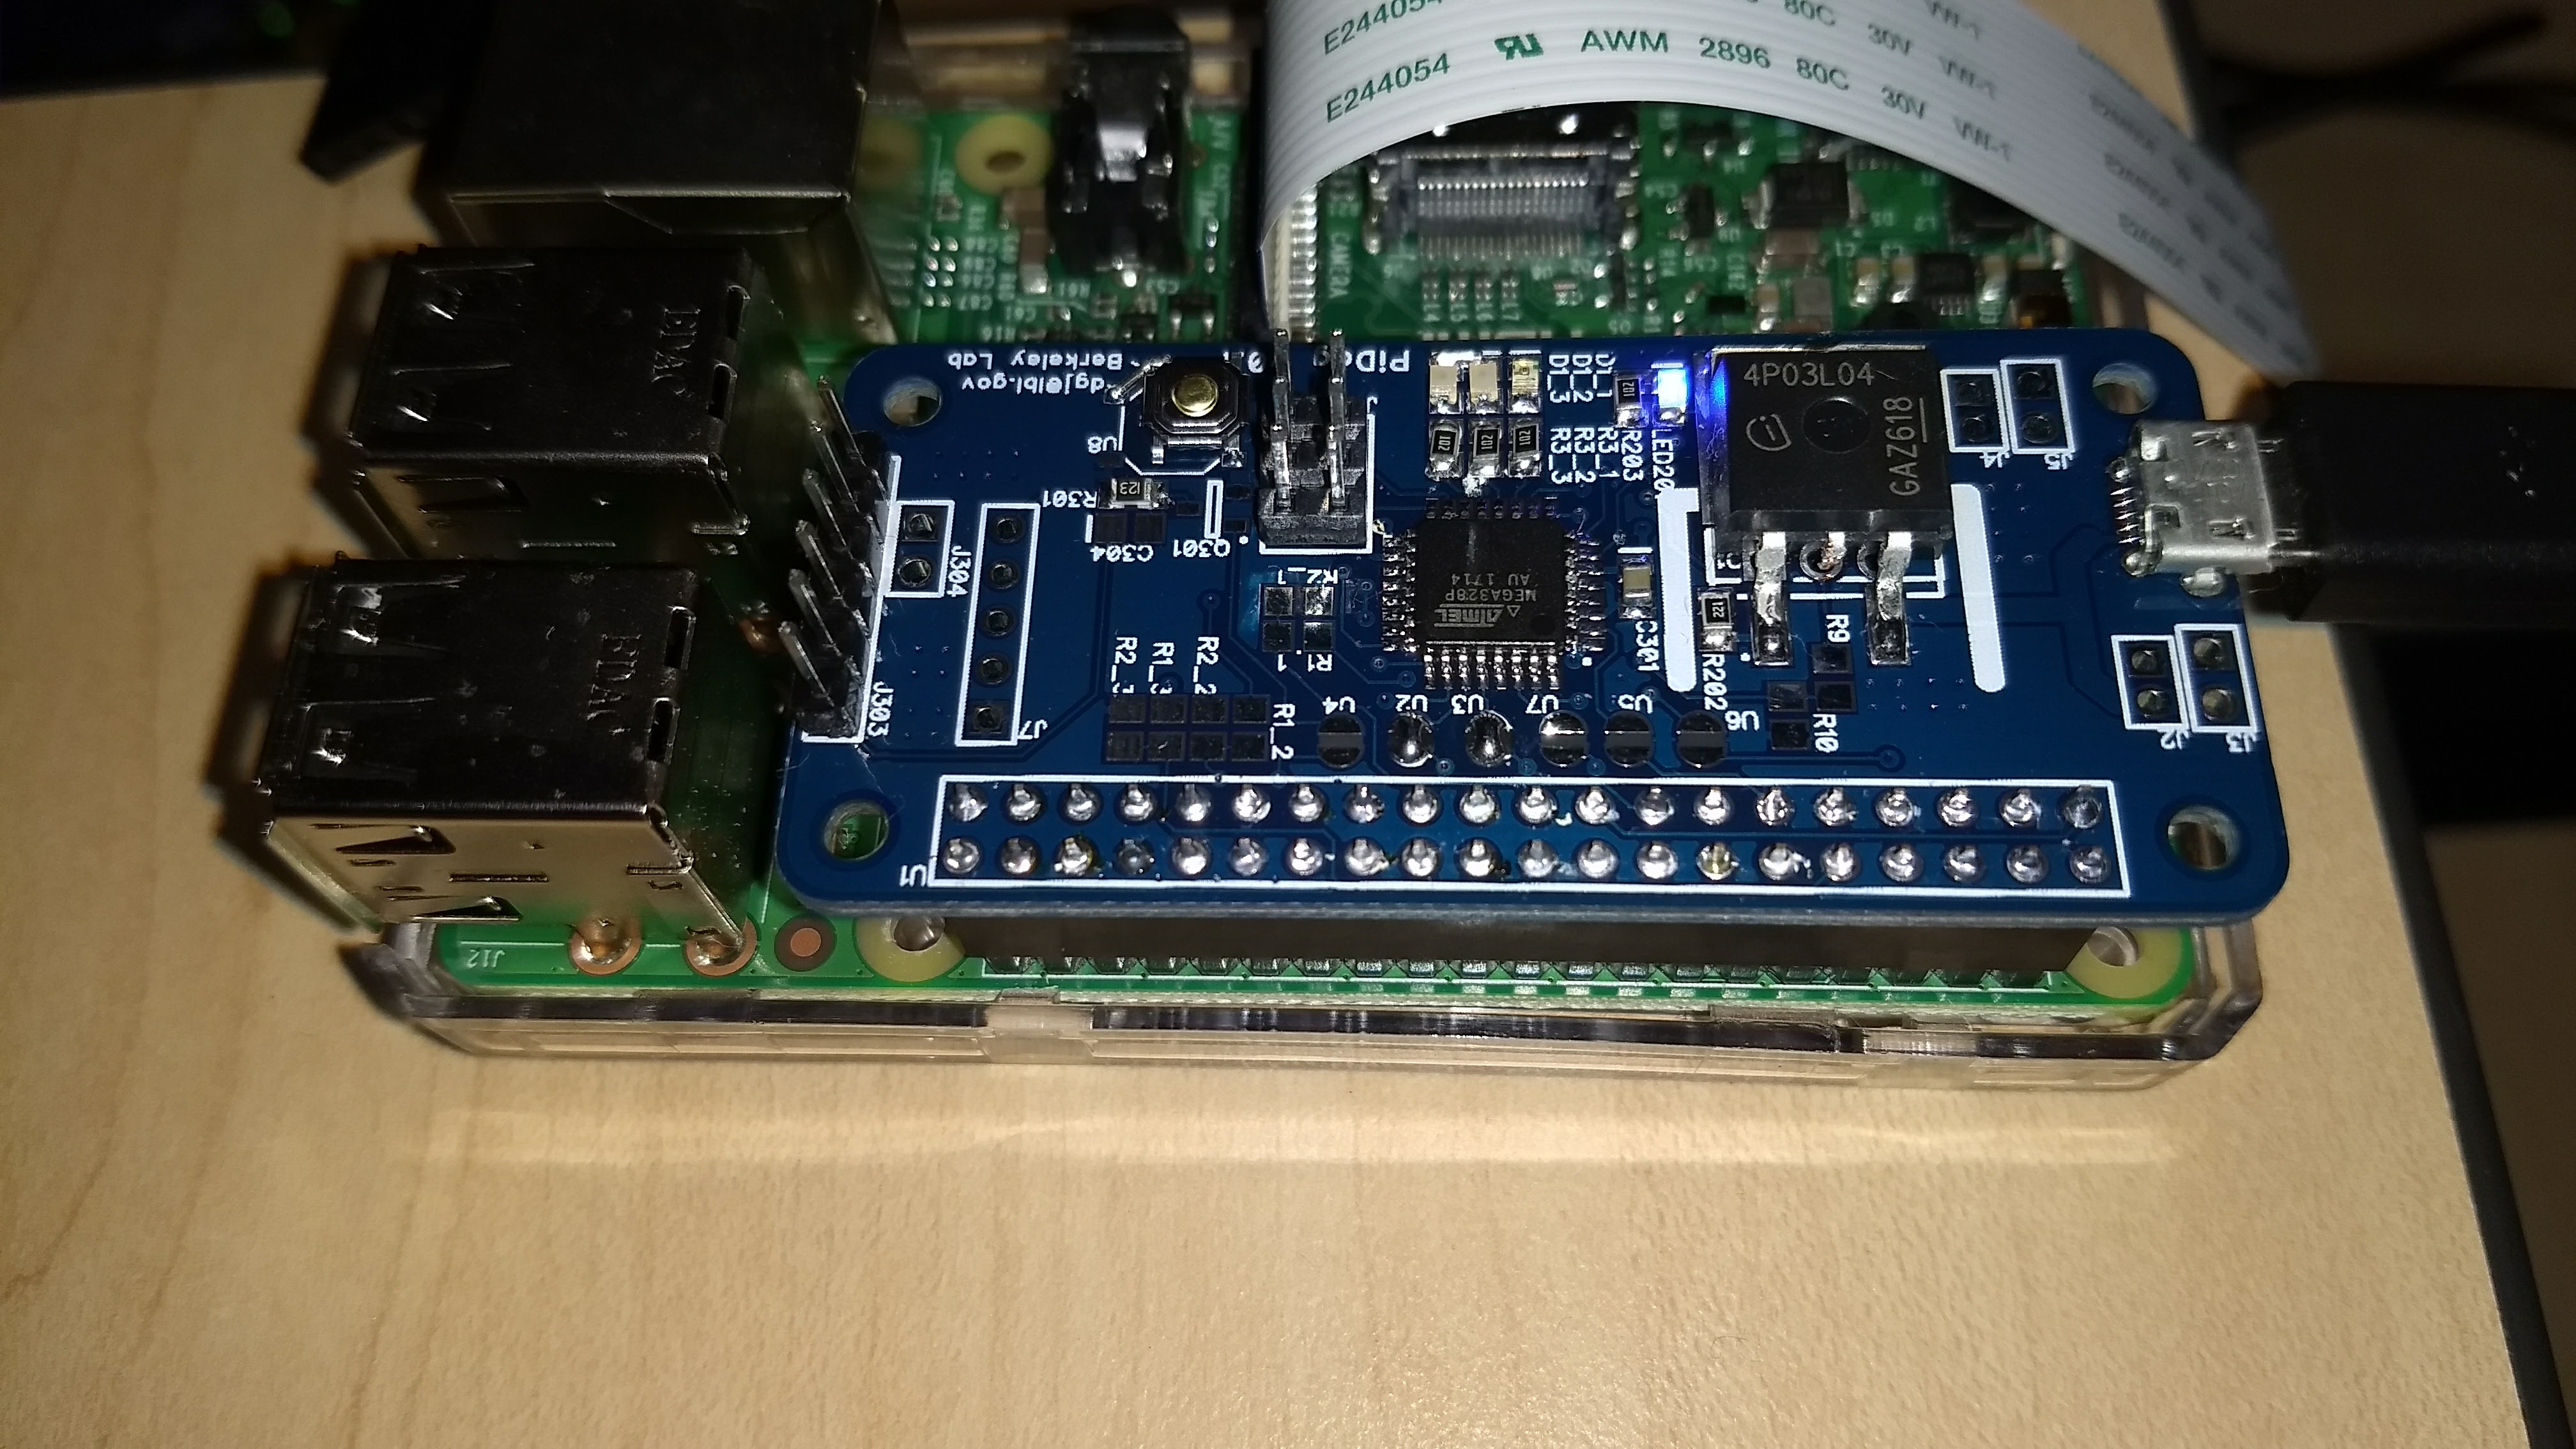
The Attiny watchdog circuit works pretty well, but it was a hand-made hack on a proto board and the communication “protocol” is pretty lame. Since deploying the first camera, I have designed a board to replace my hack on subsequent cameras. The new board is powered by an Atmega328p, which is the same processor that the Arduino uses. I am abandoned the Attiny because I want to use i2c to communicate and the 328p has an i2c hardware module. You can bit-bang (that is, do it in software) i2c with the Attiny, but the RPi i2c controller has a bug which makes it unreliable with slower i2c devices. Anyway, the i2c interface allows transferring more complex messages between the processors, like “shut down in 3 minutes and then wait 7 hours 47 minutes before starting me up again.” The new board just plugs into the RPi and you plug the power cable into it rather than the RPi, so it’ll be unfussy to setup.
The board design:
Finished board in action:
Software
The software side of things was comparatively simple and only took a few hours to get up and running. (I’ve spent a lot more time on it since, though!) On the RPi, a python script snaps pictures every few seconds. It compares each image to the previous one it took, and if they are sufficiently different (that is, something in the scene has changed), it sends the image to a server. If the picture is the same as the last, the server is only pinged to let it know the camera is still alive. Hours can go by without any pictures being sent.
On the server, the images are analyzed using the ML model to determine if there are turkeys. I did not have a sufficient training set of turkey / non-turkey images to build a custom model, so I am using a pre-cooked Amazon AWS model called Rekognition to ID the poultry. This is my one concession to proprietary “cloud” stuff. Rekognition is idiot-proof, so maybe no the best demo of ML chops, but, eh. One thing about using AWS is that it costs money, so the optimization of not sending redundant images is important for not racking up a huge bill.
The server is written in NodeJS, and receives and processes the pictures as well as hosting a simple website. All communication is JSON messages over REST over HTTPS.
When it comes to software, I have an ongoing war with myself. I like to keep things simple for me (not so much typing) but also like to keep things actually simple (not reliant on large, complex frameworks and libraries that bring in zillons of dependencies and things I don’t understand and can’t easily maintain). To this end, I tried to stick to libraries available from apt and even then, not too much. On the RPi, I used the standard camera and GPIO libraries that come with Raspbian, and installed the python3 modules requests and scikit-image. (I chose not to use OpenCV, which is a shame, because it looks cool. But there is no pre-built package and I didn’t want to build it from source. Building complex things from source on the Pi takes a loooong time, trust me!) On the server, I used Node with Express and I think no other modules — though to be fair, package management in Node is a breeze anyway.
Oh, and for course there is some code running on the Attiny and there is some HTML and Javascript for the client side — so this little project encompasses four or five separate languages, depending on how you count. I think I could have done the server in Python, but I’m still grappling with concurrency in Python. Maybe one day I’ll figure.
Code, in all its uncommented, late-night hacking glory is here: https://github.com/djacobow/turkeycam.
Putting it in a Box
Probably the hardest part of this project for me was figuring out how to do it physically. Getting a proper waterproof box was easy. But how to mount the panel to the box, and then mount both of them to a tree or light stanchion was quite tricky for his non-mechanical engineer. I spent quite some time poking around Home Depot trying to figure out how to make it work. In the end, I bought a bunch of angle aluminum and start cutting and drilling and filing and screwing until I got something that more or less worked. It was a lot of effort, though, and doesn’t look very good. I really wished I could offload this part to someone more mechanically inclined than me.
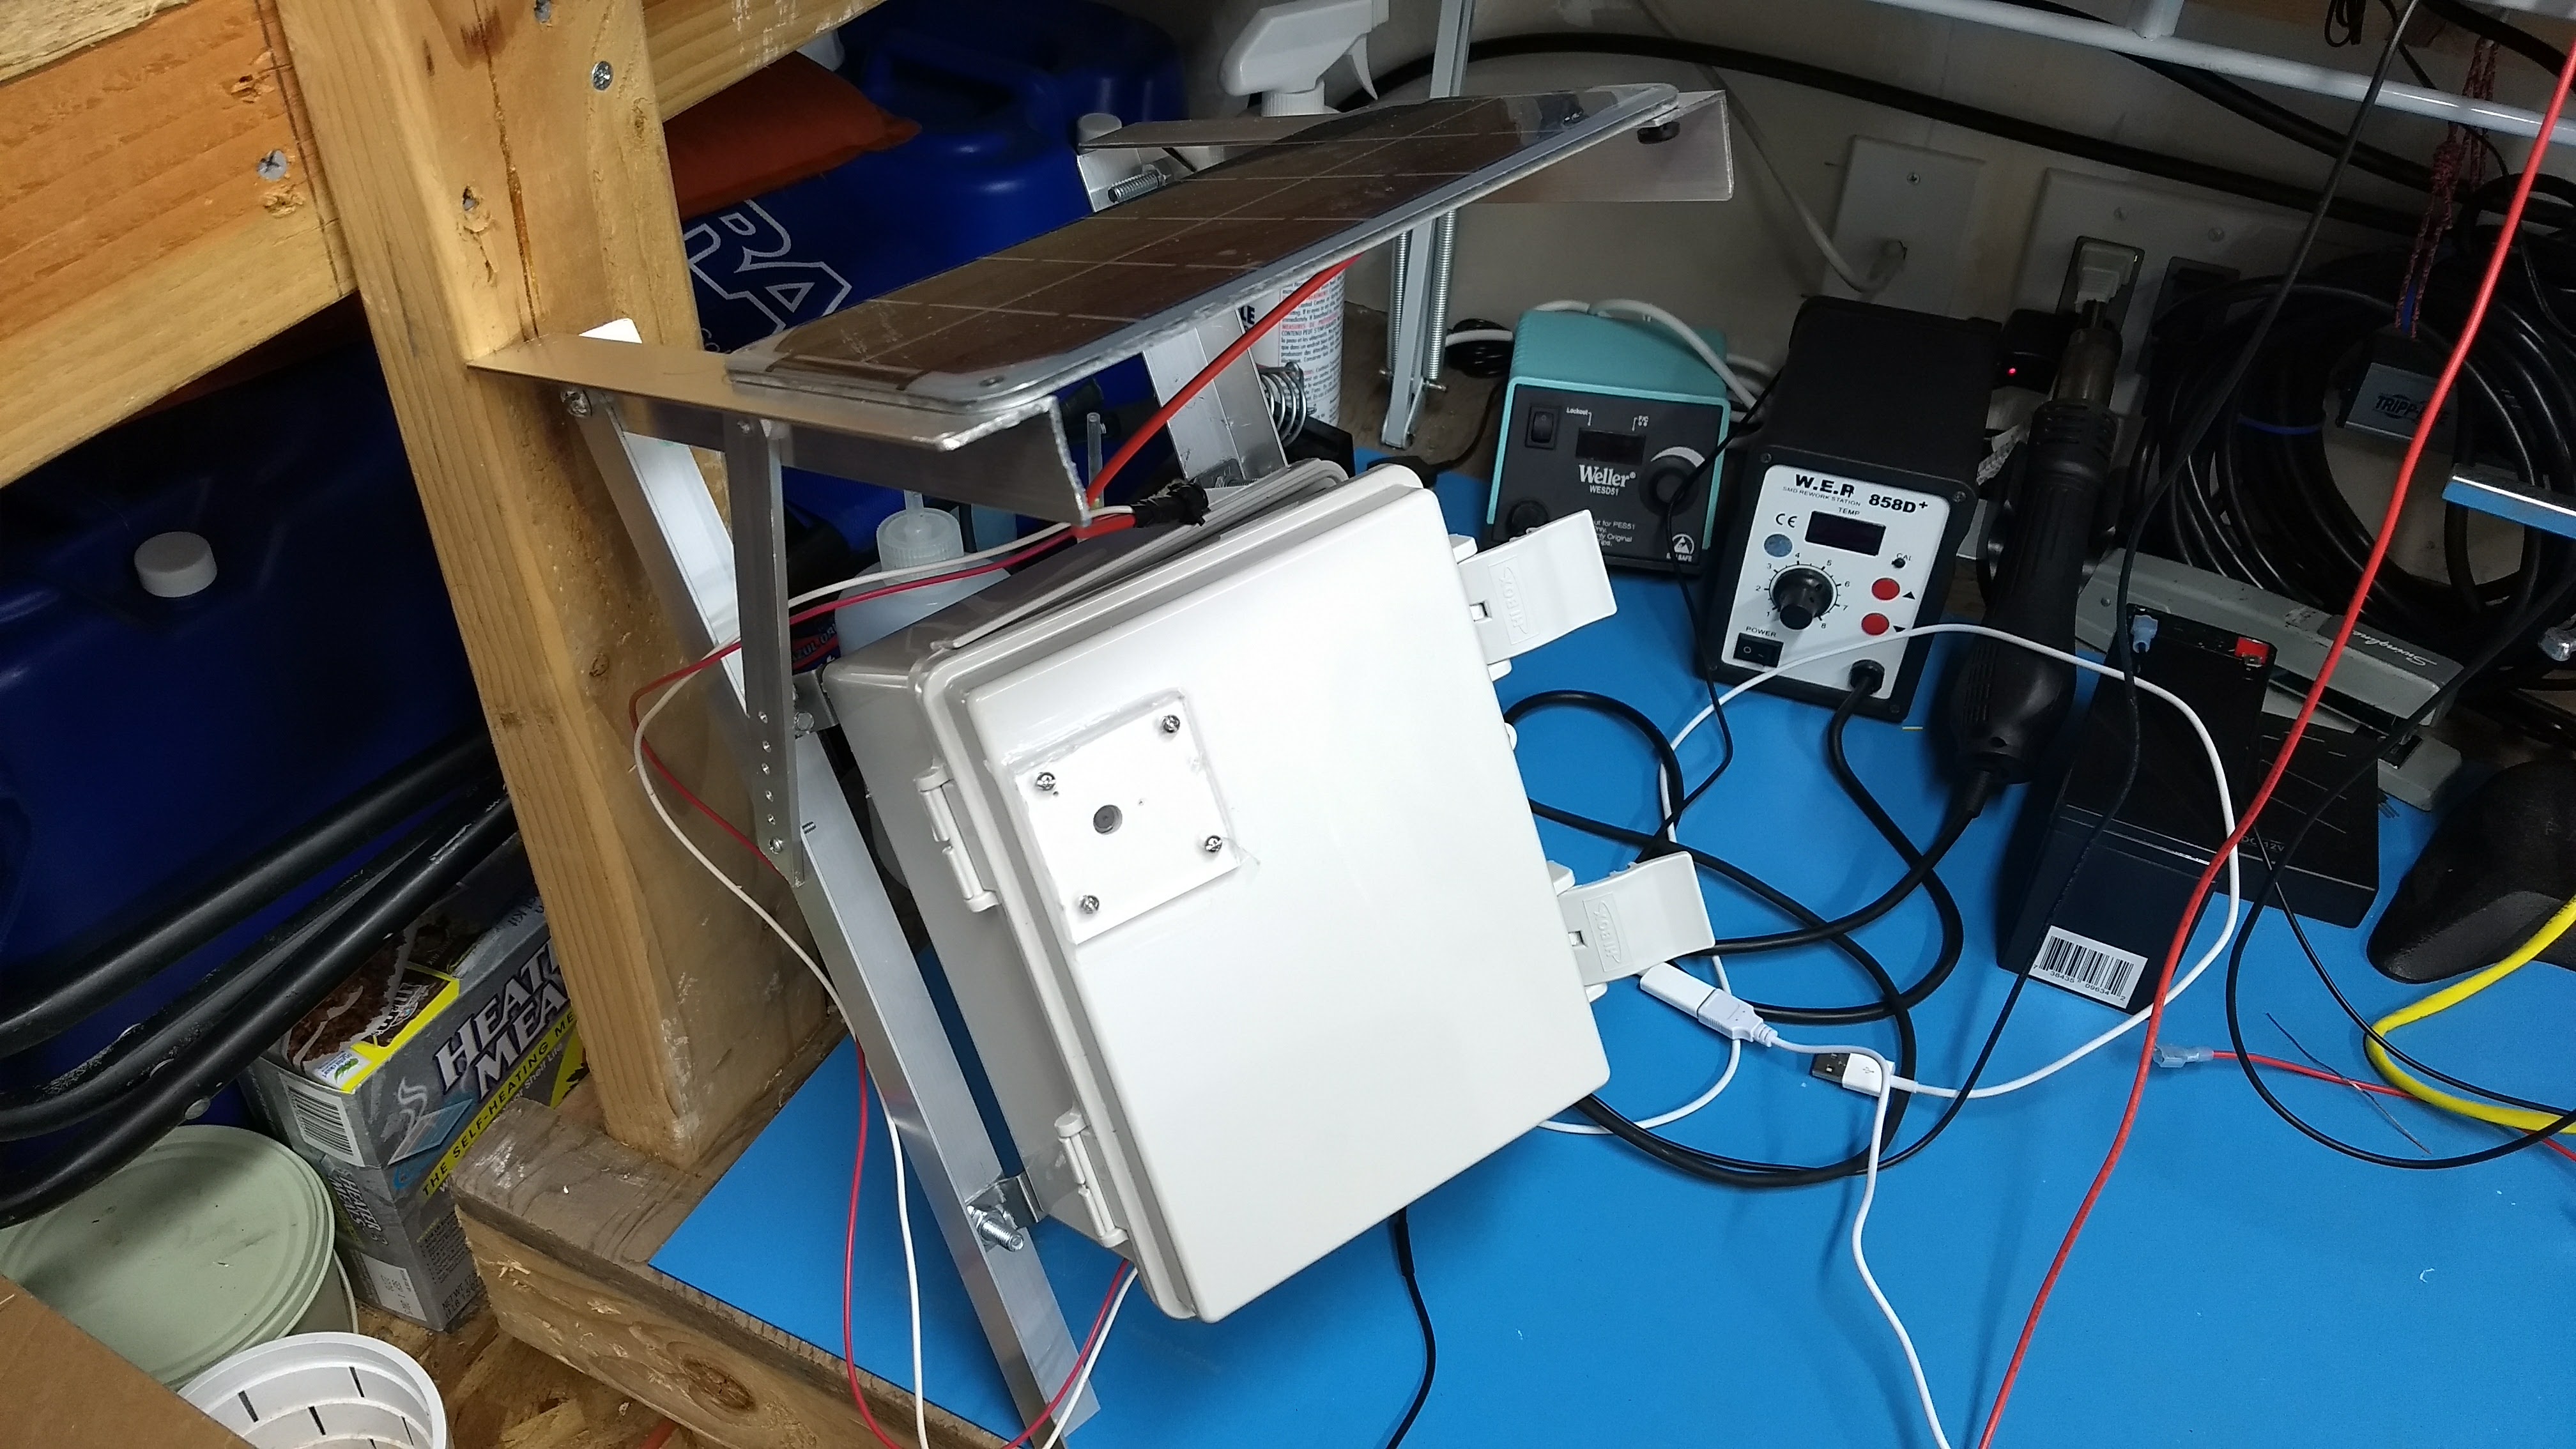
Anyway, that’s it. We finally got the first camera deployed and after fixing a few bugs, it has started catching turkeys.
Does it Work?
You can see the system in operation here: https://skunkworks.lbl.gov/turkeycam. This is my “personal” dev server, and so it may be up or down or not showing pictures when you visit. Also, the second camera pictured is showing my office and will do so for the time being.
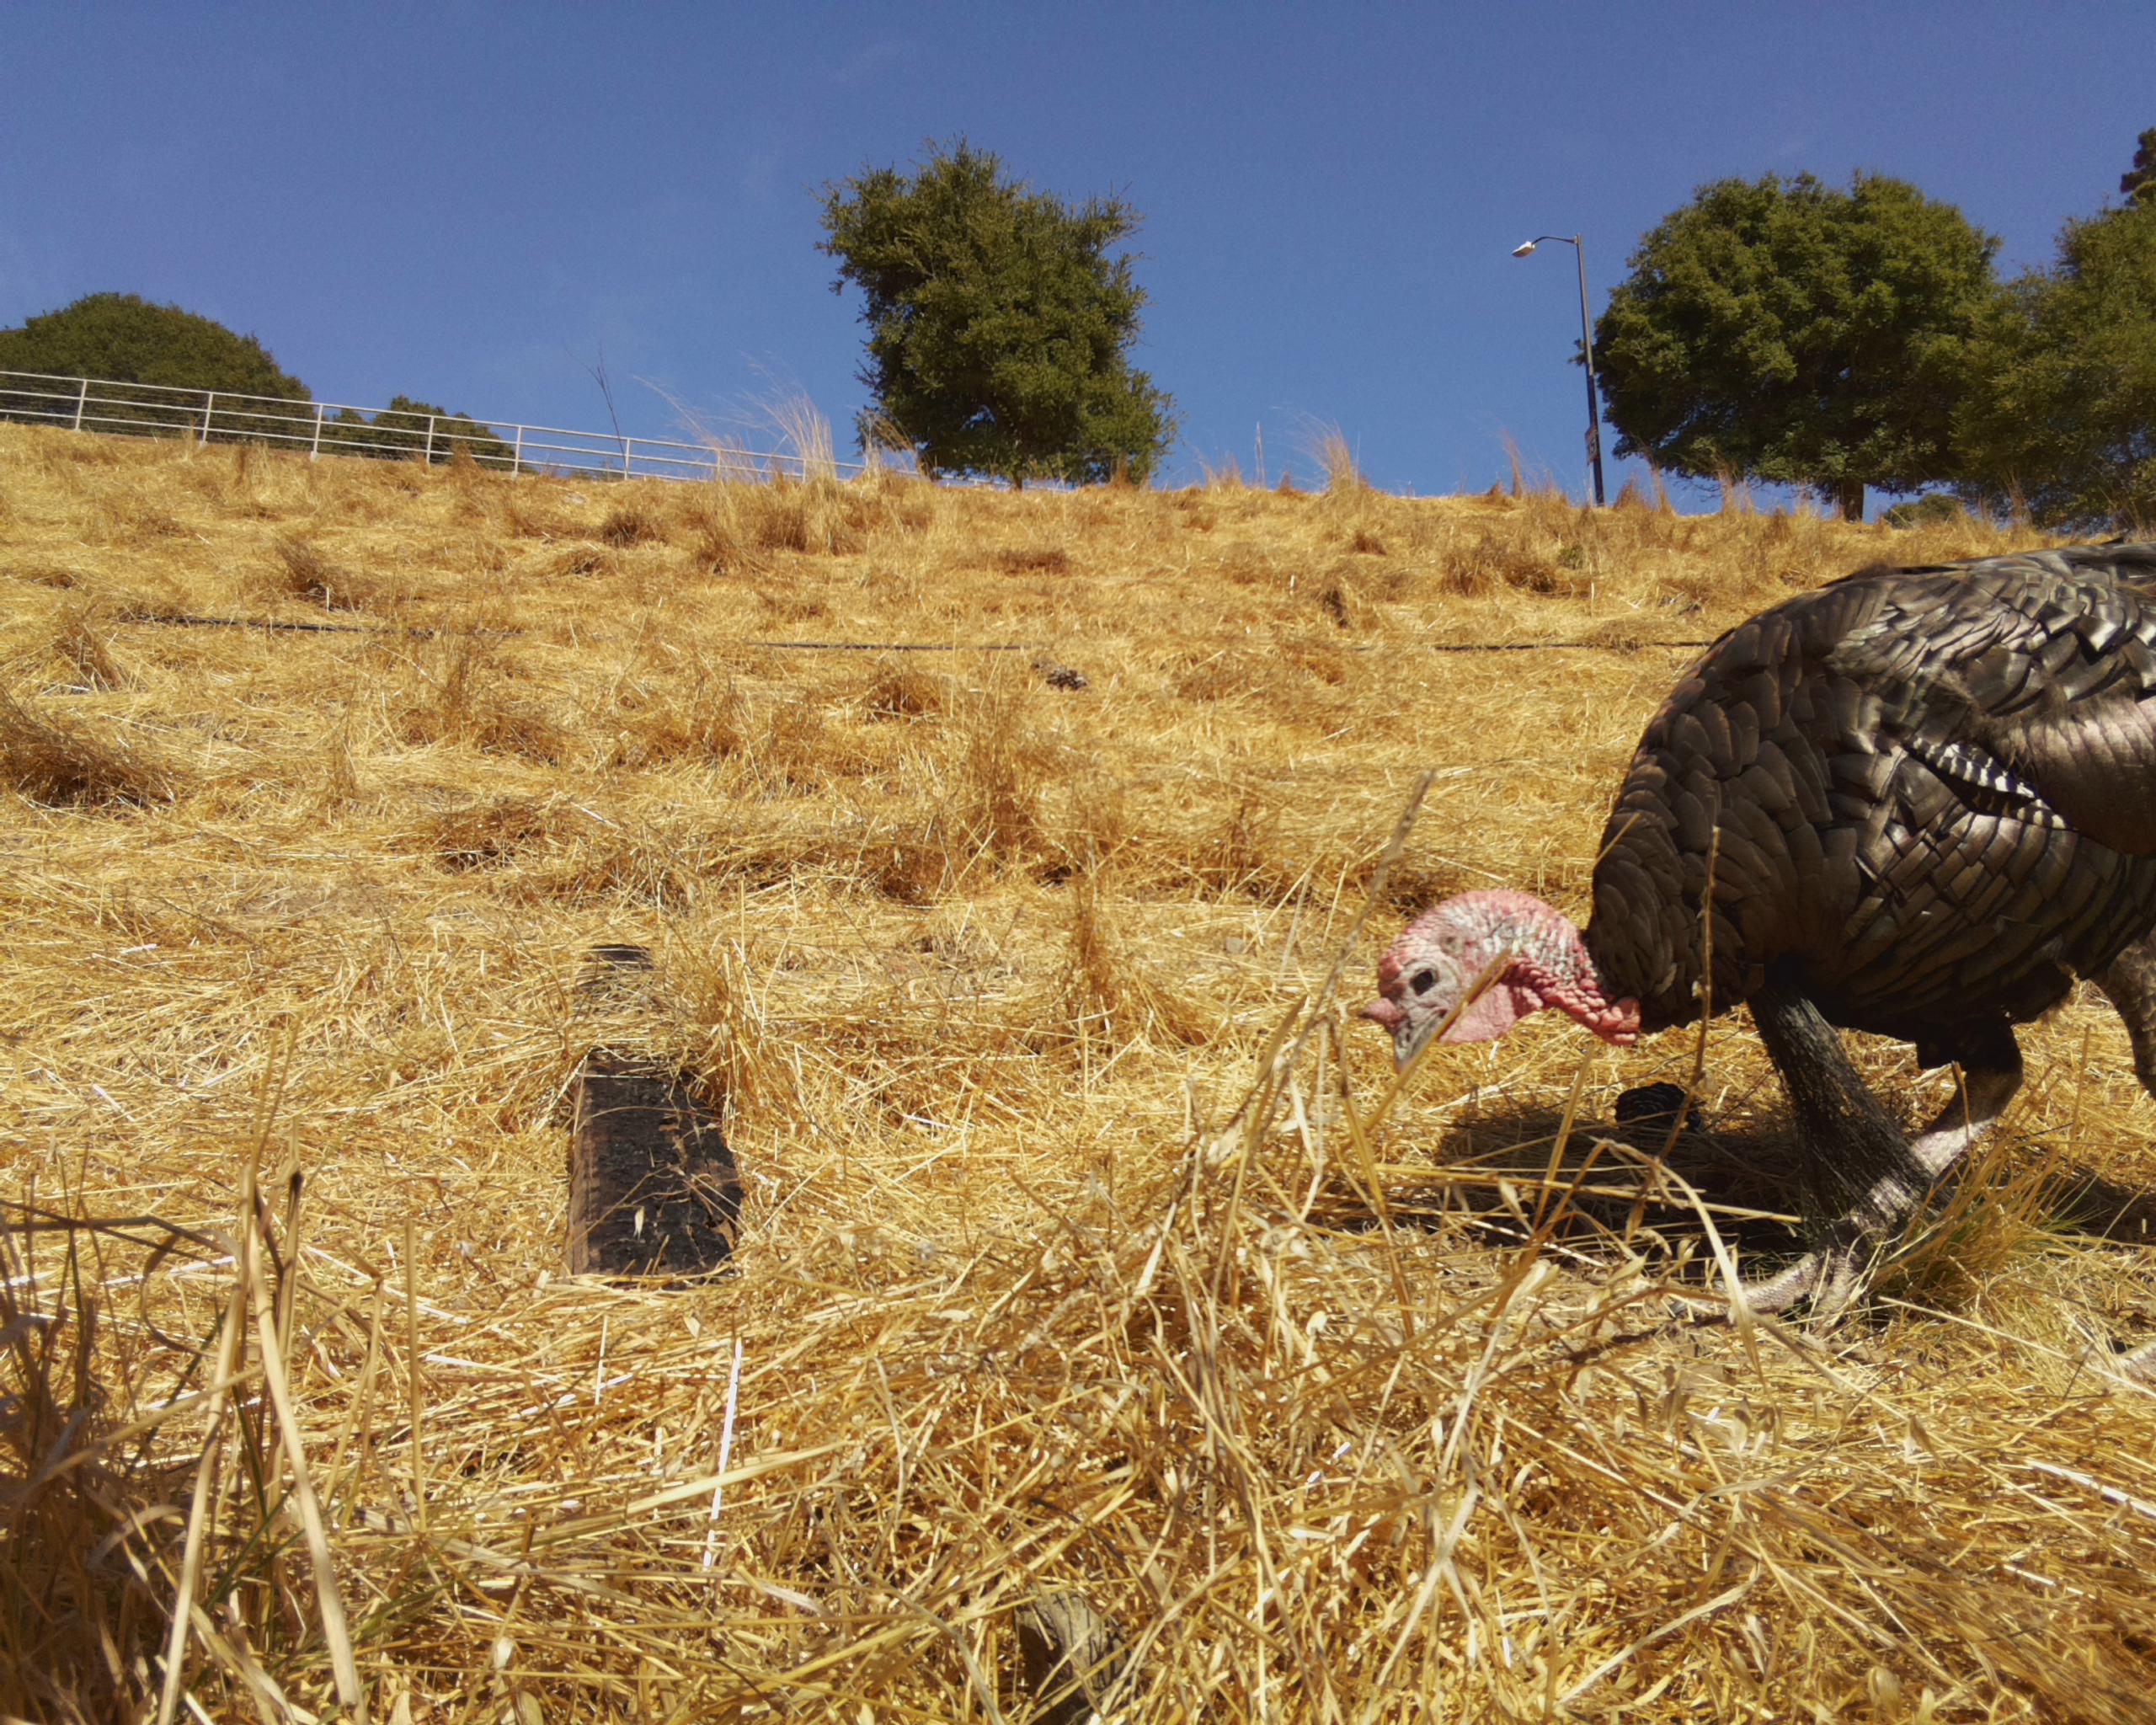
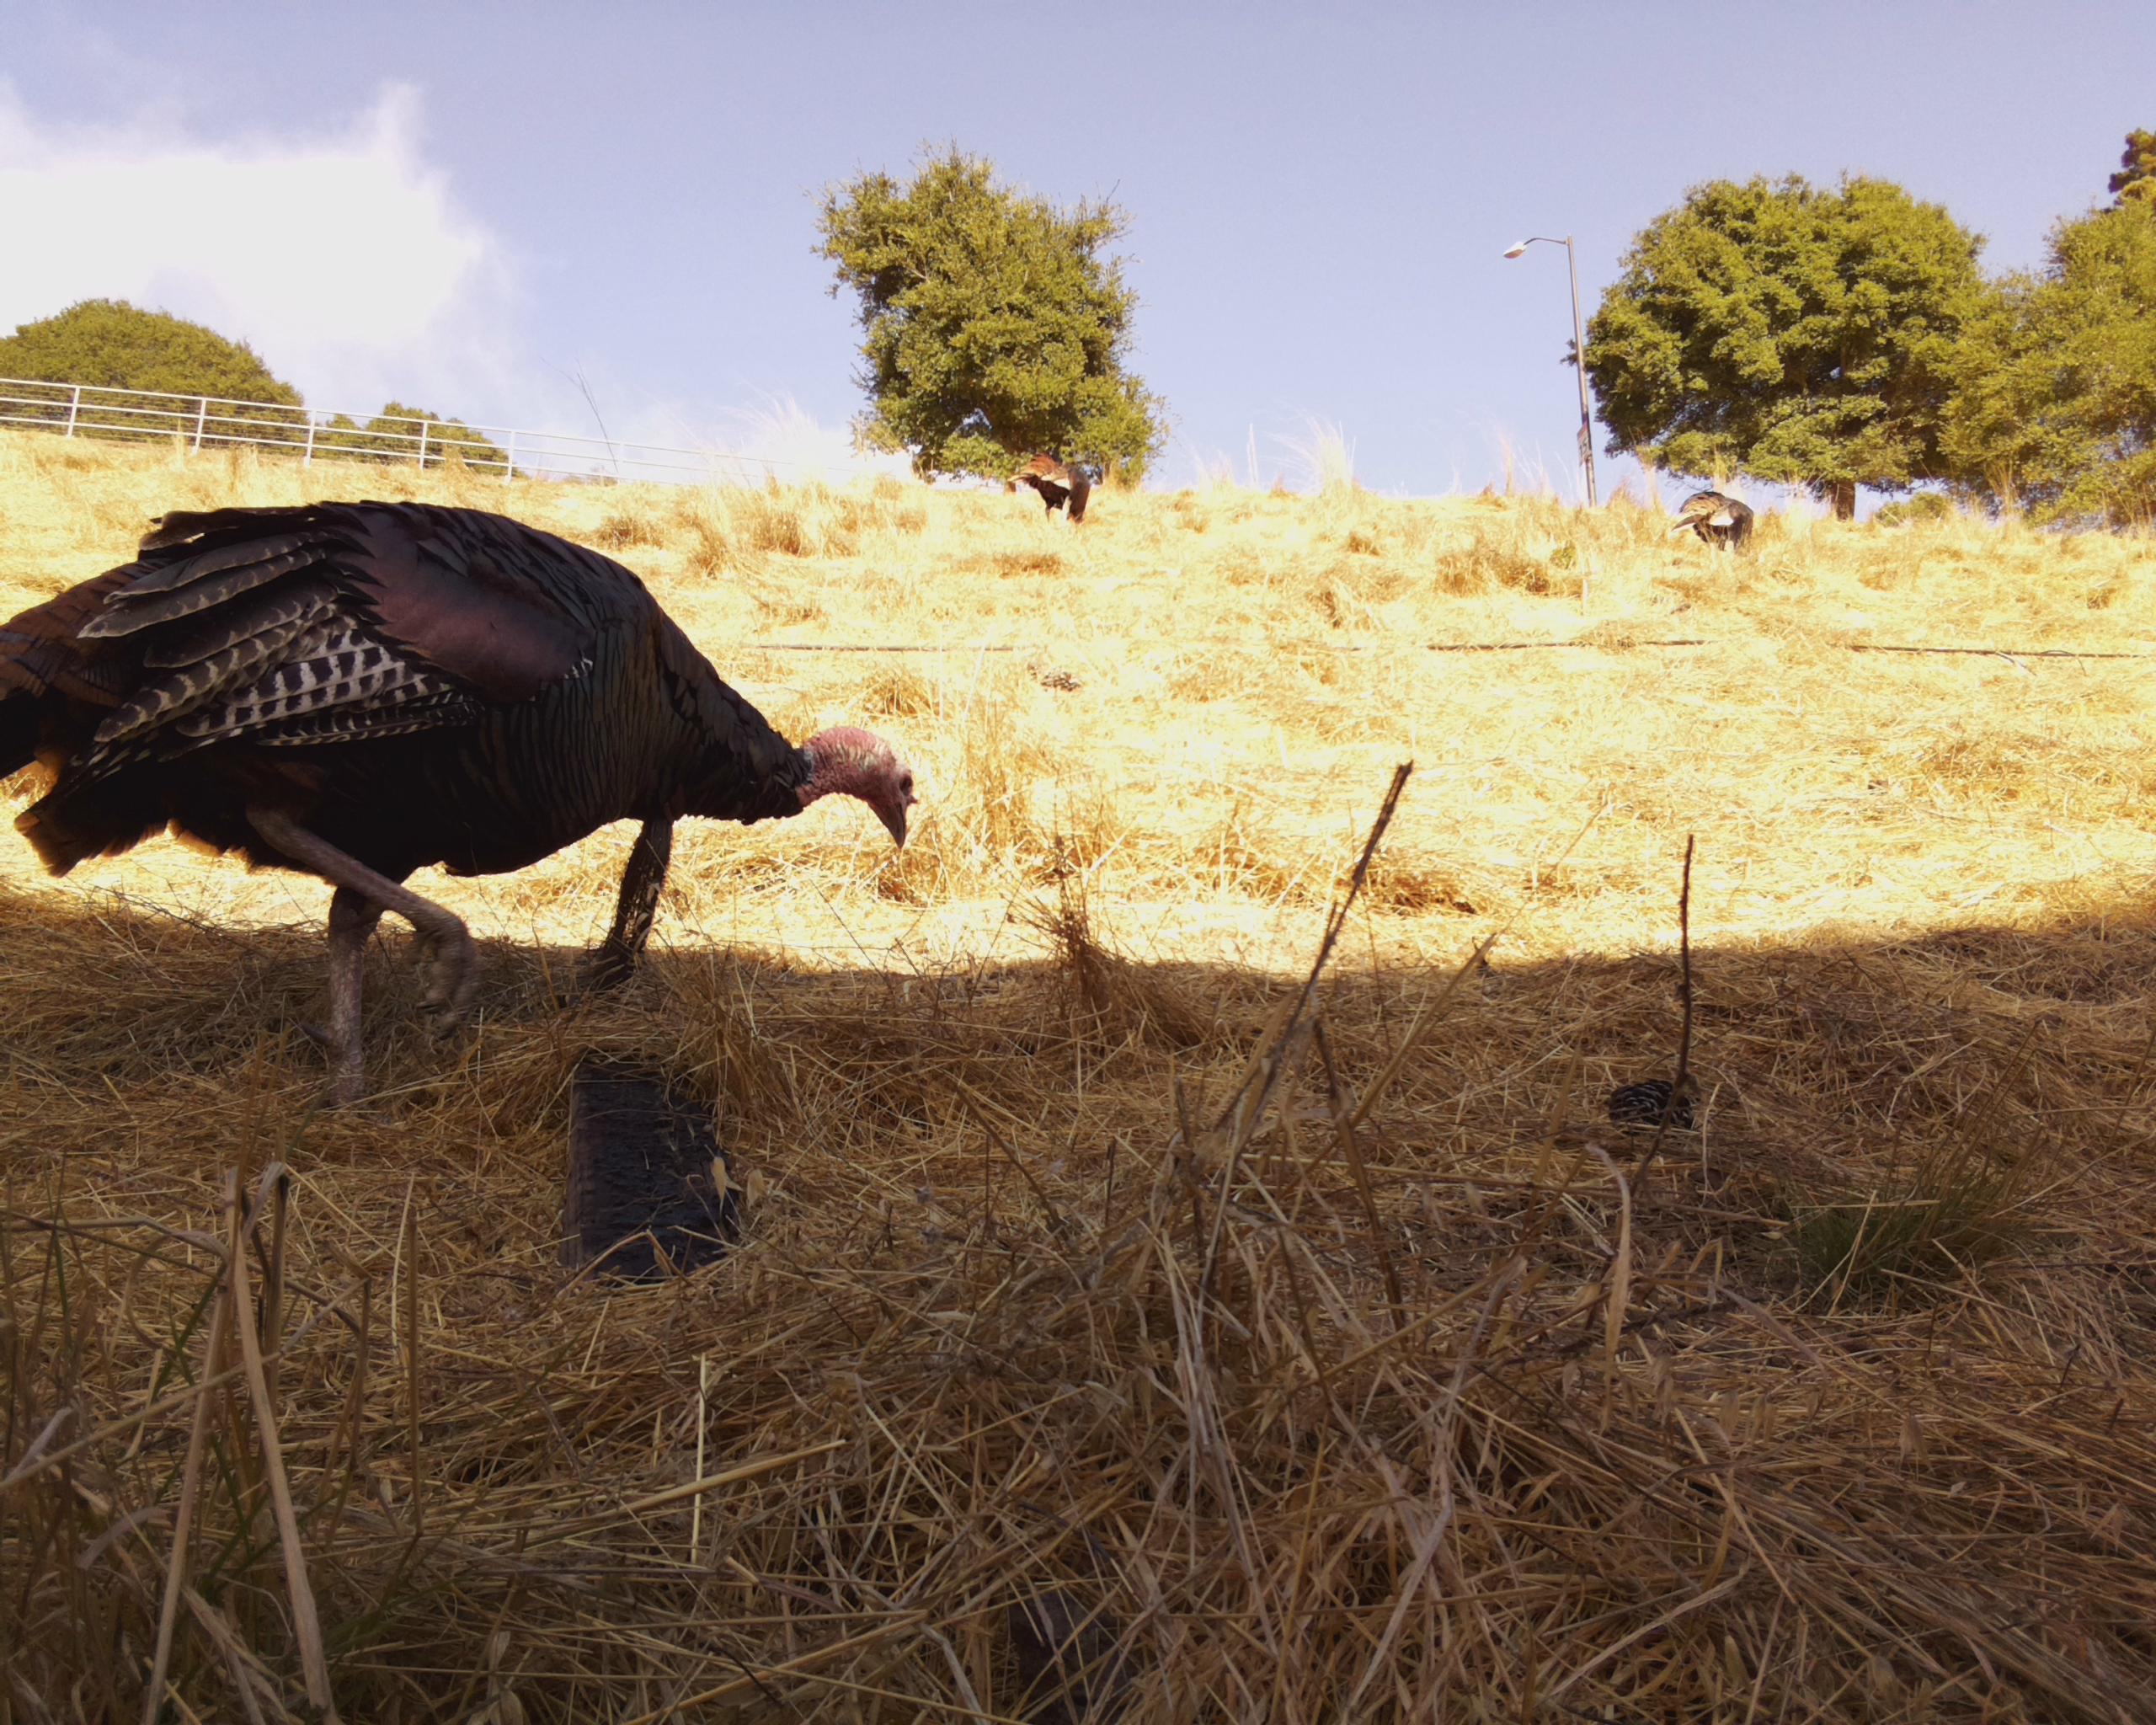
Here are some turkeys we caught today:

That looks like it works great! Doing it on the cheap (and using the ML algorithm to single out turkeys) seems like it would appeal to lots of people–biologists, environmental scientists, etc etc. I suppose that security and policing agencies probably are already doing this extensively with fancier, proprietary technology. And who knows what our internet overlords are doing with all the cameras trained on us. But this seems like something that could help us understand things on a much broader basis. Cool project!
thank you very much, i ike the article, it can help me